Many model railroaders choose N Scale because of space limitations for their layout. Often times,
those limitations also apply to storage space for rolling stock, tools, and other accessories associated
with the hobby. Here is a method to organize and store lots of rolling stock in a small area.
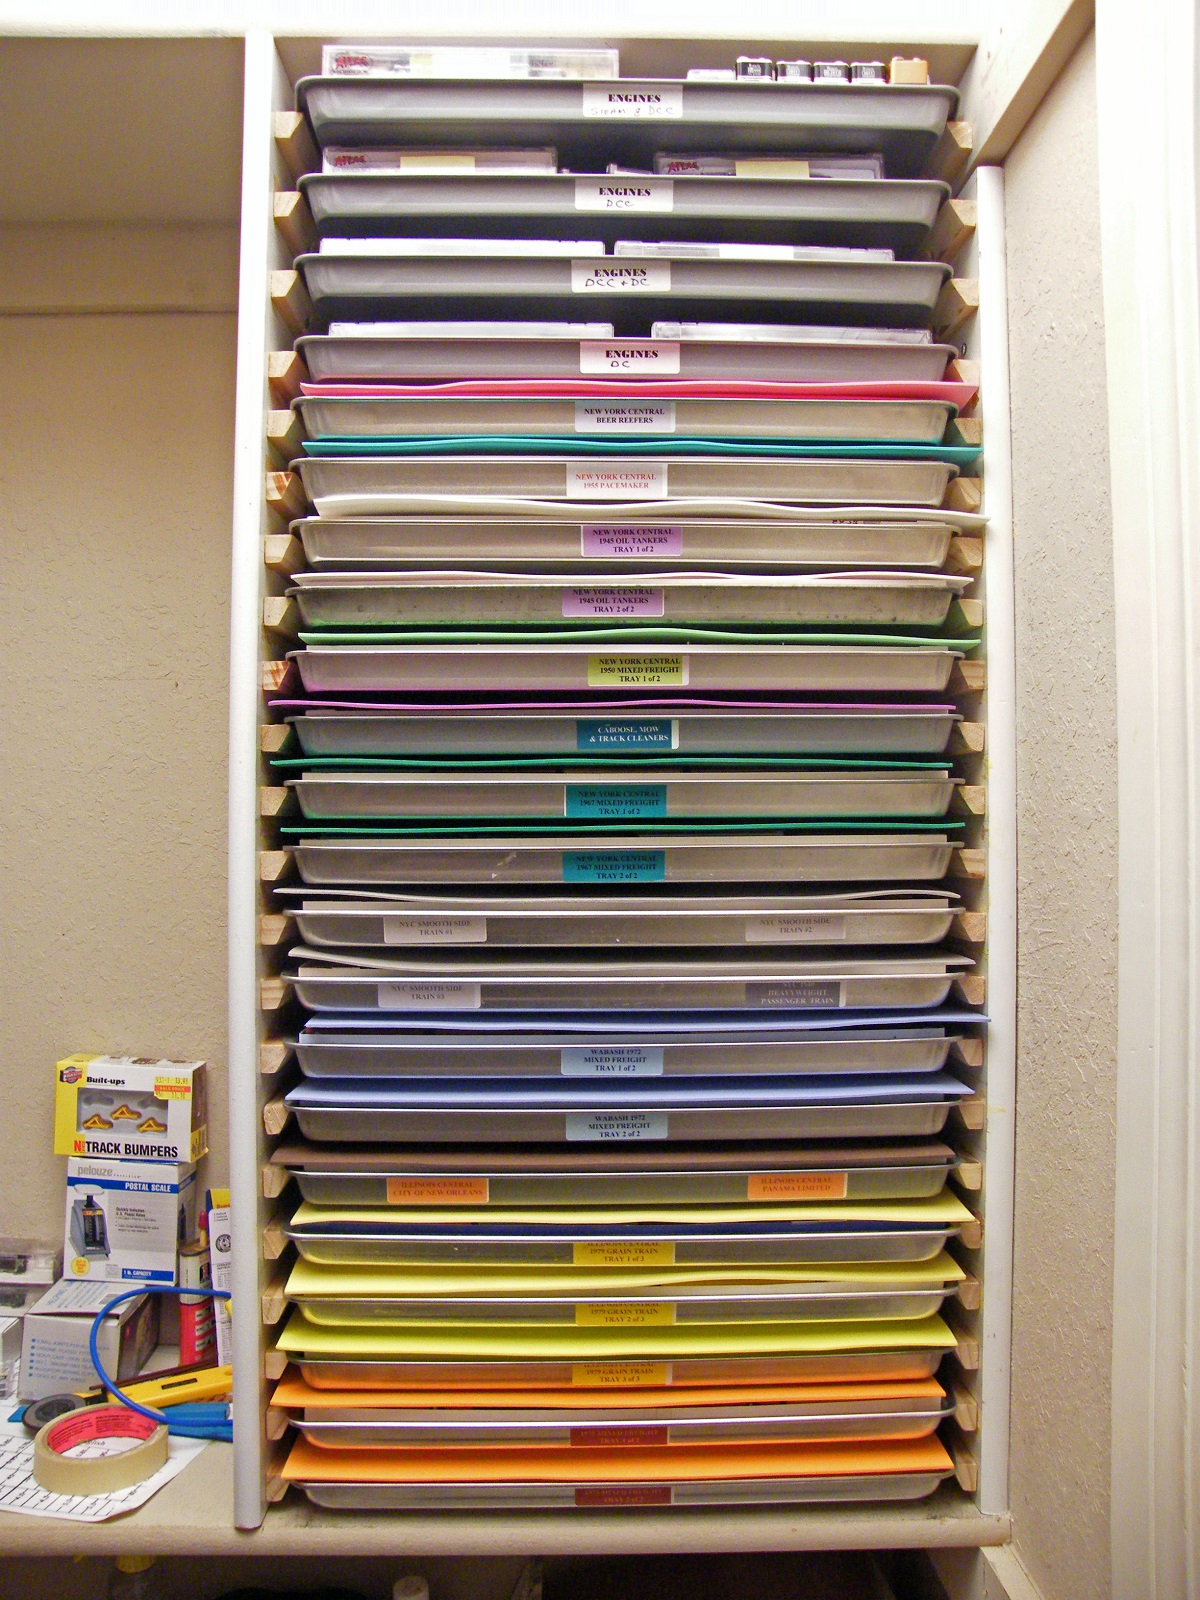
Figure 1 - Storage Rack Loaded
Standard cookie sheets are nominally 17” long, 11” wide and 1” deep (interior measurements.) When
packed properly, a single cookie sheet can hold around 2800 scale feet of rolling stock (sixty-five 40’
box cars or fifty-two 50’ box cars or any combination of cars.) These cookie sheets can be stored in
racks built between the shelves of a closet. Figure 1 shows how 22 sheets are stored in a 19” wide strip
between the top and bottom shelves of a closet. That’s enough storage for over 1200 cars!
Part I -- The Cookie Sheets. Be sure to get full sized cookie sheets that are the standard 1” depth.
Next, purchase two 12”x18” compact foam sheets for each tray from your local craft store (Michaels, for example.)
Buy them in pairs of the same color so the tray is color coded for easy identification of the train you want.
Trim one sheet to fit in the bottom of the tray. Leave the other one at full size to place over the tray,
keeping dust and debris off the cars (Figure 2).
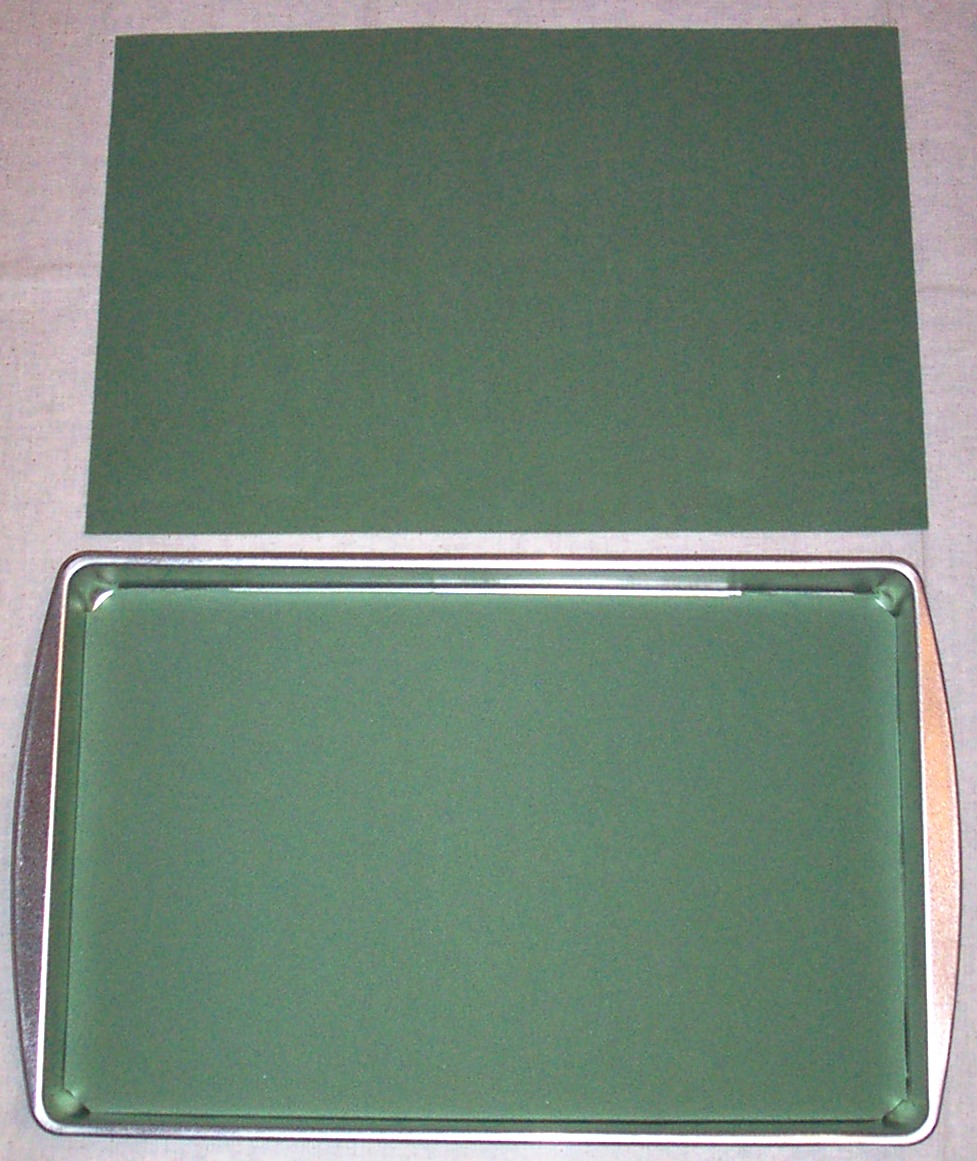
Figure 2 - Compressed
Foam Base & Lid to
Protect Cars
While at your favorite craft store or Wally World, also purchase a sheet of poster board (acid free preferred,
but not required.) I have had this system in place for 10 years and have found that the poster board protects
the sides of the cars from wear without damaging the paint. Mark the poster board and cut fourteen 1” wide
strips that are 18.17” long and two that are 1” wide by 12.33” long. I cut my poster board with one of my wife’s
old fabric rotary cutters, but an Exacto knife and straight edge will work just fine (Figure 3).
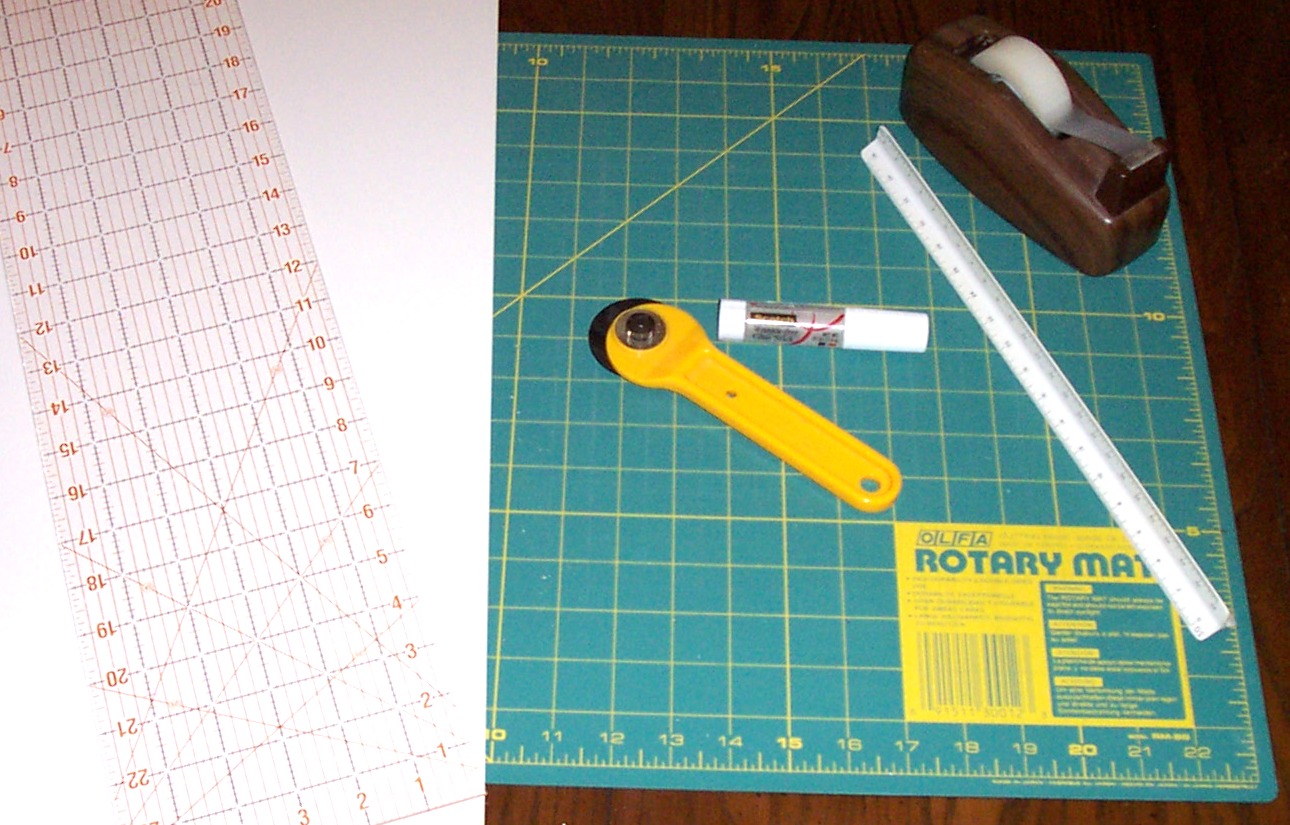
Figure 3 - Tools and
supplies for making
grids
WARNING – don’t
use her good rotary cutter on poster board or it may be the last thing you ever do! Score both ends of each
strip ¾” from the end and crease to form glue tabs. Mark lines on the short strips every 0.833” (Figure 4) .
Those marks indicate where each of the interior grid strips will go. Use a glue stick to attach the 12 interior
long strips to one short end strip, placing the crease marks of the tabs over each 0.833” mark (Figure 5) .
Fold each of the 12 interior strips back against its glue tab, apply glue to the other end strip and attach it to the
interior strips aligning the crease marks with the spacing marks on that end strip. If you have measured and
glued correctly, the grid should lie flat. Fold it the other way to be sure it is rectangular. Attach the top
and bottom end strips. Nip the bottom corners of the grid so it will fit easily in the tray and reinforce the
corners with Scotch tape (Figures 6 & 7).
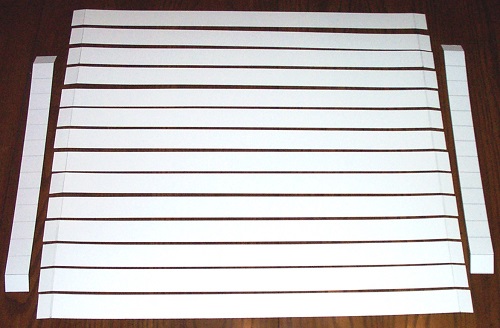
Figure 4 - Poster Board
Strips Ready For
Grid Assembly
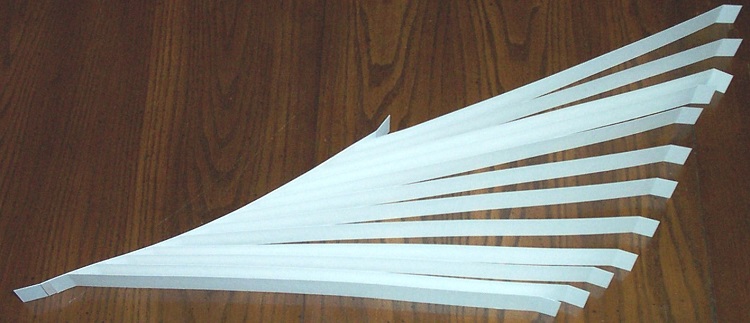
Figure 5 - Grid Partially
Assembled - Interior strips
attached to side strip
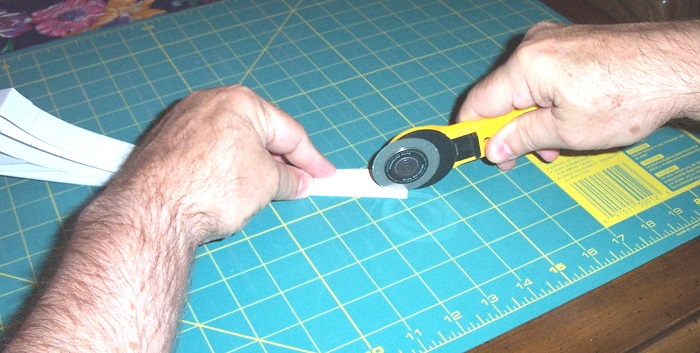
Figure 6 - Nipping corners
with rotary cutter
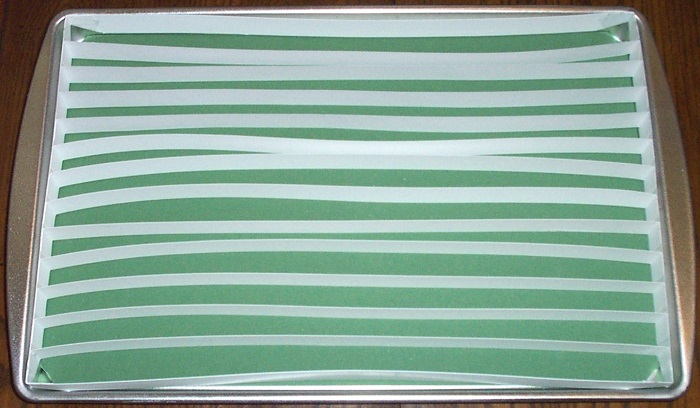
Figure 7 - Finished 13
horizontal row grid
For most trains with a mix of car types and sizes, a 13 horizontal row grid is the best (Figure 8). For unit trains,
however, some minor grid modifications can increase storage capacity. For example, a row in the standard 13
horizontal row grid has room for four 46’ Bethgon CoalPorters with one inch left over. By shortening the twelve
interior 1” strips by 0.833”, a vertical row can be added at one end allowing space for two more coal gons and a
caboose (Figures 9 & 10). Unit grain trains with 55’ 3-bay hoppers have room for only three cars per row, but the
leftover space allows for four vertical rows that will house two hoppers each (Figures 11 & 12). And, if you get
fancy, there’s room for two 40’ cars at the end of the vertical rows. Note that the Grain Train grid and the
passenger grid are essentially the same, with four vertical rows. If a tray is to hold excess height box cars,
auto racks, bi-level passenger cars, TOFCs and/or well cars with containers, make the grid for that tray with 1¼”
wide poster board strips rather than 1” wide strips so the whole car will be protected. The wider strips will not
cause a clearance problem when stored in the rack.
.jpg)
Figure 8 - Mixed Freight
(13 hor rows)

Figure 9 - Coal Gon Load
(13 hor. rows + 1 vert. row)
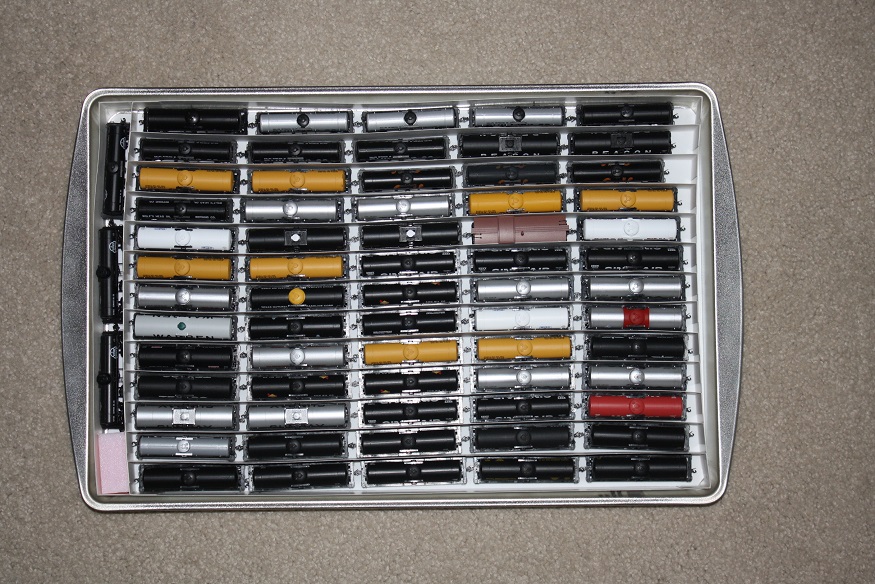
Figure 10 - Tank Cars
(13 hor. rows + 1 vert. row)
.jpg)
Figure 11 - Grain Hoppers
(13 hor. rows + 4 vert. row)
Vacant spaces should be filled with blocks of ¾” foam. These fillers are made by cutting 1” wide strips from a sheet
of ¾” extruded insulating foam and then cut these 1” x ¾” bars to the length of the empty space (Figures 13, 14 & 15.)
The foam is available at Home Depot. Foam fillers add stability to the grid and keep the cars from moving around on
the sheet. As you add cars to your train, just trim the filler to the size needed and use the cut piece somewhere else.
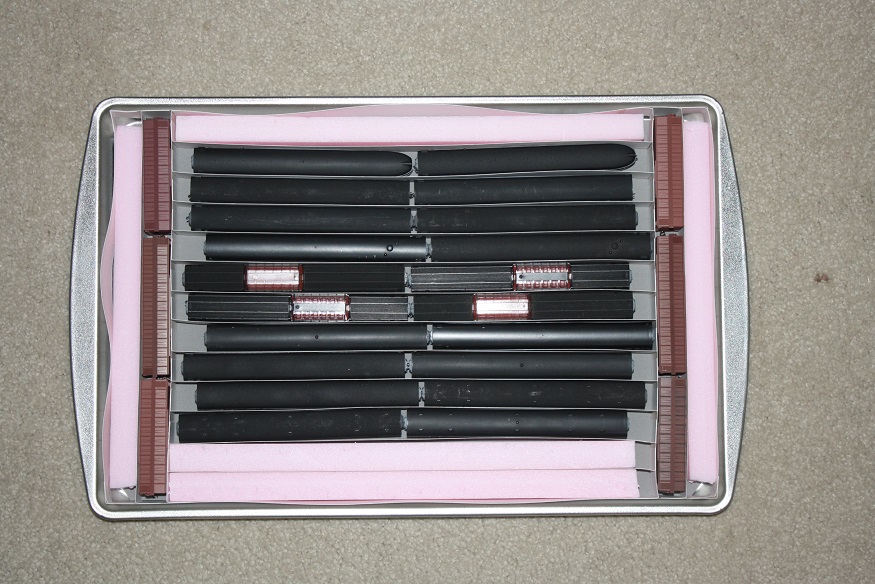
Figure 12 - Passenger Cars
(13 hor. rows + 4 vert. row)
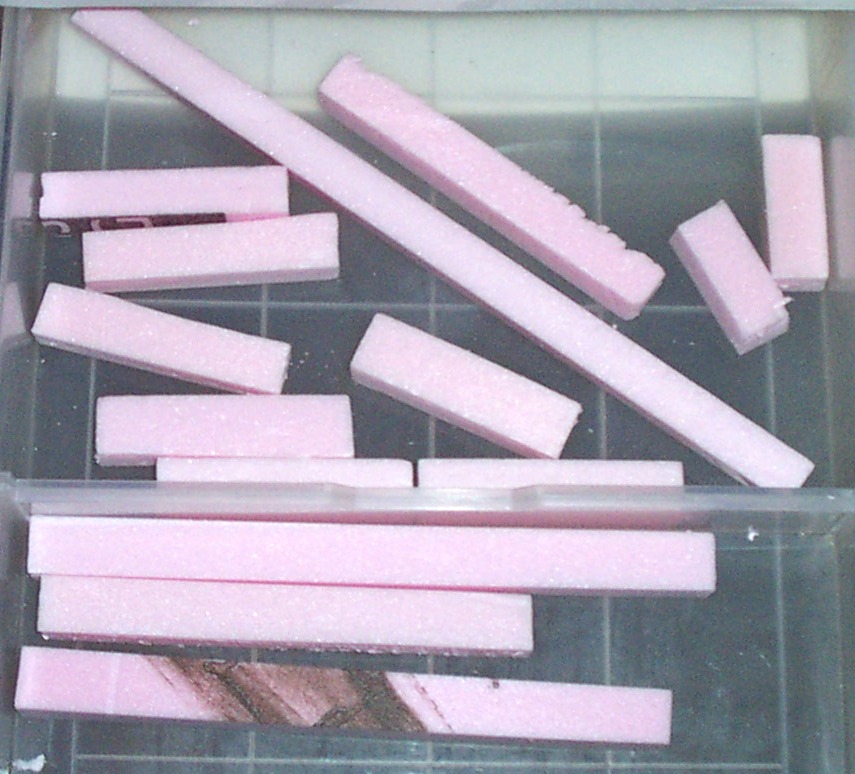
Figure 13 - Foam fillers
of various lengths
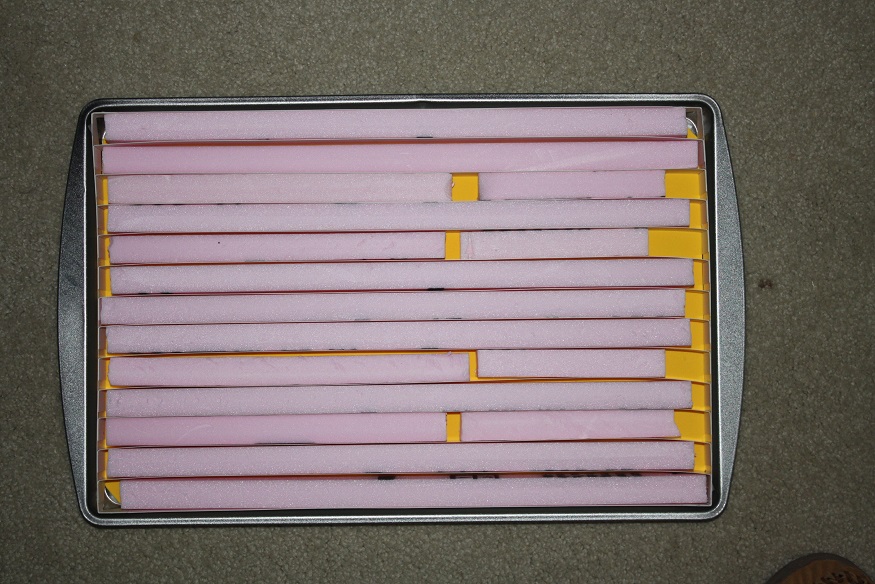
Figure 14 - Grid with
foam fillers
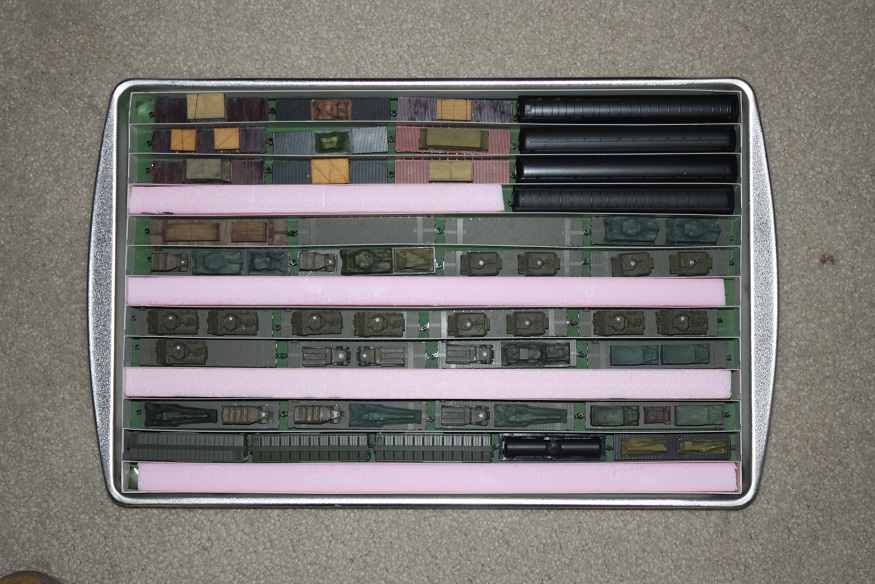
Figure 15 - Partially filled
with spacers in open areas

Figure 17 - Tray Front View
.jpg)
Figure 16 - Jewel Cases
(no grid, foam base optional)
Finally, attach adhesive labels such as Avery #5160 (1” x 2 5/8”) to the front of each tray to identify its contents.
Microsoft Word is pre-programmed for these labels so that they can be easily printed and even color coded.
Part II – The Closet Storage Rack Closets with a double clothes rack usually have a lower shelf about 40” off
the floor and an upper shelf about 80” off the floor, leaving around 39” between the shelves for the rack. Before
building the rack, the existing shelves and their runners need to be reinforced since, when fully loaded, the weight of
20+ trays can be up to 100 lbs. Drive some long screws through the shelf support brackets and into the wall studs and
screw the shelves to the support brackets.
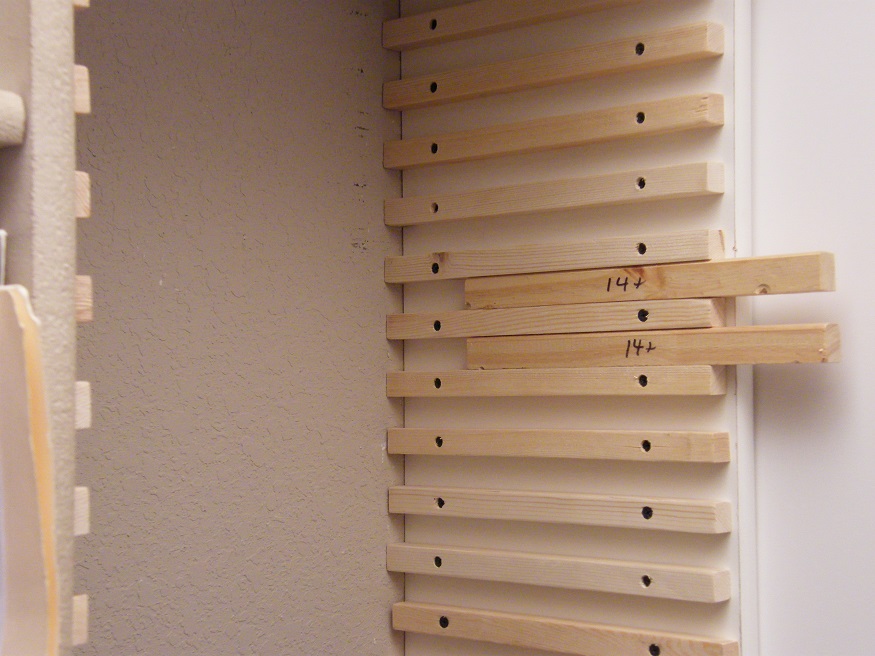
Figure 18 - Storage Rack
Showing Spacers
For the shelf racks, space the vertical boards 19¼” apart and secure to existing horizontal shelves with screws.
(Use standard 12” x ¾” shelving boards for the vertical supports.) To make the runners that hold the trays, rip a 1 x 4
into ¾” strips. You should get four strips per board. Chop the ¾” x ¾” strips into 11” long runners. Drill pilot holes
for the screws and sand. Glue and screw the runners using 1 ¼” screws and spacing them with a 7/8” gap between the top of
one and the bottom of the one above it. This gap will allow adequate room for high clearance cars and the top piece of
foam. (Hint: Make a spacer jig that is 7/8” tall. After you screw and glue the lowest runner, place the jig on top of
that runner and place the next runner on top of the jig, screwing it in place. Move the jig and continue up the wall.
Make a taller jig if you want more clearance between some of the shelves.) (Figure 18)
This storage rack can also be built in modular form by simply screwing a 20¾” piece of shelving across the top and bottom
of the vertical boards and attaching a piece of 3/16” hardboard to the back of the rack. The module can then be placed not
only in a closet, but under your layout or anywhere. The modular version of this system can be built to any height and can
be made portable by attaching wheels to its bottom and/or a handle to the top. Just remember that when loaded, it can
become VERY heavy.
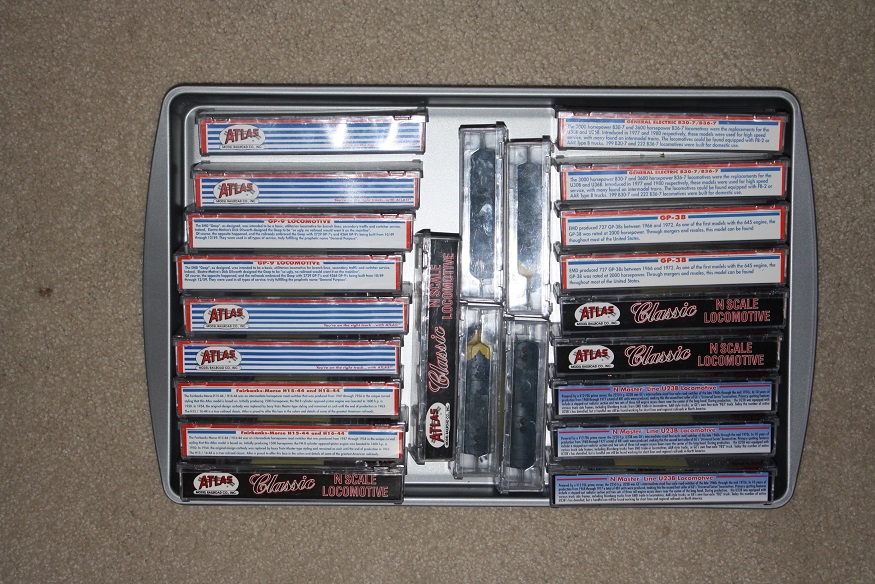
Figure 19 - Locomotives
in jewel cases
I keep my engines in their jewel case boxes and store them on cookie sheets without foam or a poster board grid
(Figure 19.) The jewel cases are placed on their side so the engines are stored wheels down to maintain balanced
lubrication. Locomotive trays with engines stored in this manner require additional clearance. The space between
runners meant for a locomotive tray and the runners above it should be increased from 7/8” to 1½”. Engines that have
extra tall boxes can be stored on their side or you could install one set of runners with even more clearance.
Most all of my cars are assigned to specific train consists. When I want to run a particular train, I pull out the tray
(or trays) holding that train, grab the appropriate engines from the locomotive tray and I’m ready to place cars on the
track. Having the rolling stock stored in the trays rather than in their jewel case boxes makes train setup and tear-down
much faster and easier. A friend who uses my system stores cars by type in the trays. For example, he has trays for 40’
box cars, for 50’ box cars, for reefers, etc. Another friend has trays for each railroad, trays for ATSF cars, trays for
SP, trays for UP, etc.
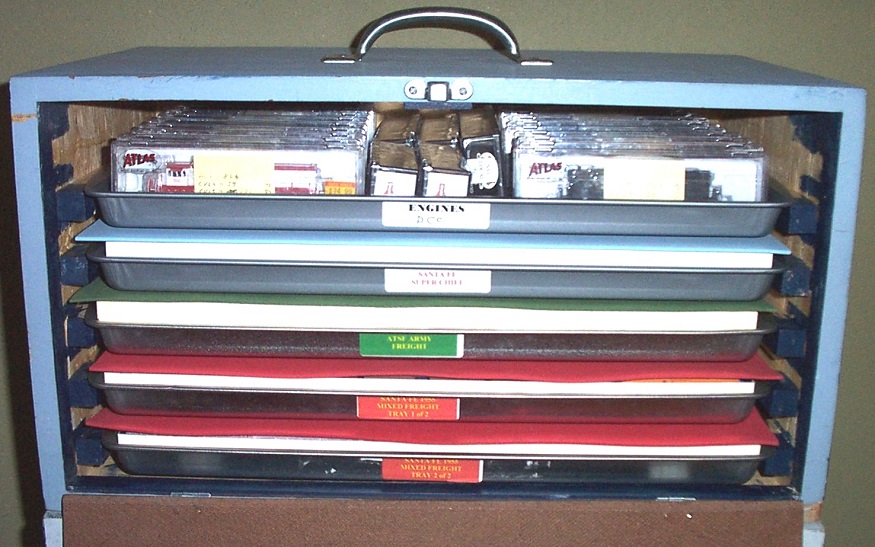
Figure 20 - Travel Case
The trays are really handy when travelling to train shows with my N-Trak club. As indicated above, a storage rack can be
made as a portable module. This can be taken one step further by installing a hardboard door to the front and a handle on
the top. I built a storage box similar to the closet rack, but with only five slots (Figure 20.) The 5-slot design yields
a travel case that is not too heavy when loaded and will easily fit in the trunk of a car. If you build one of these, give
the top shelf enough clearance so that a locomotive tray will easily fit. When it’s time to travel to a train show, all I
have to do is pick four trays with the trains I want to run at the show, load the engines on the top tray along with my DCC
throttle and spare batteries, slide the trays into the travel case and I’m ready to go.